Easy(ish) K8S on Proxmox PVE
The almost easiest and fastest setup of K8S with Proxmox
Preface
I've long been wanting to learn more about Kubernetes(K8S) but since it's introduction, I always felt it was a bit overwhelming.
Looking at the prices, when you could actually get a decent estimate, and vendor lock in that I would have to sign off on, I decided to just run it on my homelab.
This however was at the time I initially wanted to do it almost impossible with my skill set at the time.
Most of this was due tho the requirement of learning a lot of advanced networking and infrastructure technologies and core principles, all which seemed way out of reach.
Fast forward to present time, I've learned a lot more about infrastructure, networking and the community tools and documentation for K8S has been steadily improving.
So I decided to give it another shot, still with the goal of self hosting the cluster and to my surprise it was actually pretty doable, with not a lot of skills required.
Prerequisites
Proxmox PVE
Packages
Helm
Kubectl
Talosctl
(Optional) A domain
Used for the Traefik dashboard etc.
(Optional) Headlamp
GUI tool to inspect and work with a K8S cluster
Talos
The setup for Talos was extremely easy and well written.
I'll post the steps I took here, but highly advise just going through the official tutorial.
Download
Download the Talos Linux ISO to on Proxmox from the link below:
https://factory.talos.dev/?arch=amd64&cmdline-set=true&extensions=-&extensions=siderolabs%2Fqemu-guest-agent&platform=nocloud&target=cloud&version=1.11.2

Setup VM
Repeat the steps for as many VMs you need, for this guide I will be making 3 VMs(1 Control Plane and 2 Workers).
I'm also assuming the use of DHCP for all the VMs as this is the easiest.
Crate a new VM with the following settings:
General
Give the VM a name like eg.
talos-pve-00
OS
Select the Talos Linux ISO
System
Keep the defaults
Hard Disk
(Optional) Adjust disk space
Keep the rest as defaults
CPU
Assign at least 2 CPU Cores
(Optional) Change the type to whatever fits your needs
RAM
Assign at least 4 GB for a Control Plane node
Assign at least 2 GB for a Worker Node
Network
Keep the defaults
By this point three VMs should be created in Proxmox.
talos-pve-00 (Control Plane)
talos-pve-01 (Worker)
talos-pve-02 (Worker)
Go ahead and boot all the machines and write down their IPs
Setup Control Plane
I would suggest making a temporary working directory somewhere on your local machine and cd into it.
On your local machine set environment variable for control plane with the IP from the VM
export CONTROL_PLANE_IP=192.168.1.10talosctl gen config talos-proxmox-cluster https://$CONTROL_PLANE_IP:6443 --output-dir _outtalosctl apply-config --insecure --nodes $CONTROL_PLANE_IP --file _out/controlplane.yamlAfter executing the command above, you have to wait a minute for the VM to reboot and reconfigure as a Control Plane
Setup Workers
Run these commands to configure the two worker nodes.
talosctl apply-config --insecure --nodes 192.168.1.11 --file _out/worker.yamltalosctl apply-config --insecure --nodes 192.168.1.12 --file _out/worker.yamlAdjust the IPs to match whatever is reported inside the nodes in Proxmox
As with the Control Plane, after executing these commands, the Worker VM will reboot
Wrapping up
Adjust the config:
export TALOSCONFIG="_out/talosconfig"
talosctl config endpoint $CONTROL_PLANE_IP
talosctl config node $CONTROL_PLANE_IP
Bootstrap Etcd:
talosctl bootstrapNOTE: This step is important for the rest of the guide.
Get the kubeconfig
talosctl kubeconfig .Before proceeding, I would suggest adding the kubeconfig via the export command.
This is so you won't have to worry about conflicting with existing configs, if you have any.
export KUBECONFIG=~/Path/To/Project/Folder/kubeconfigTalos References
MetalLB
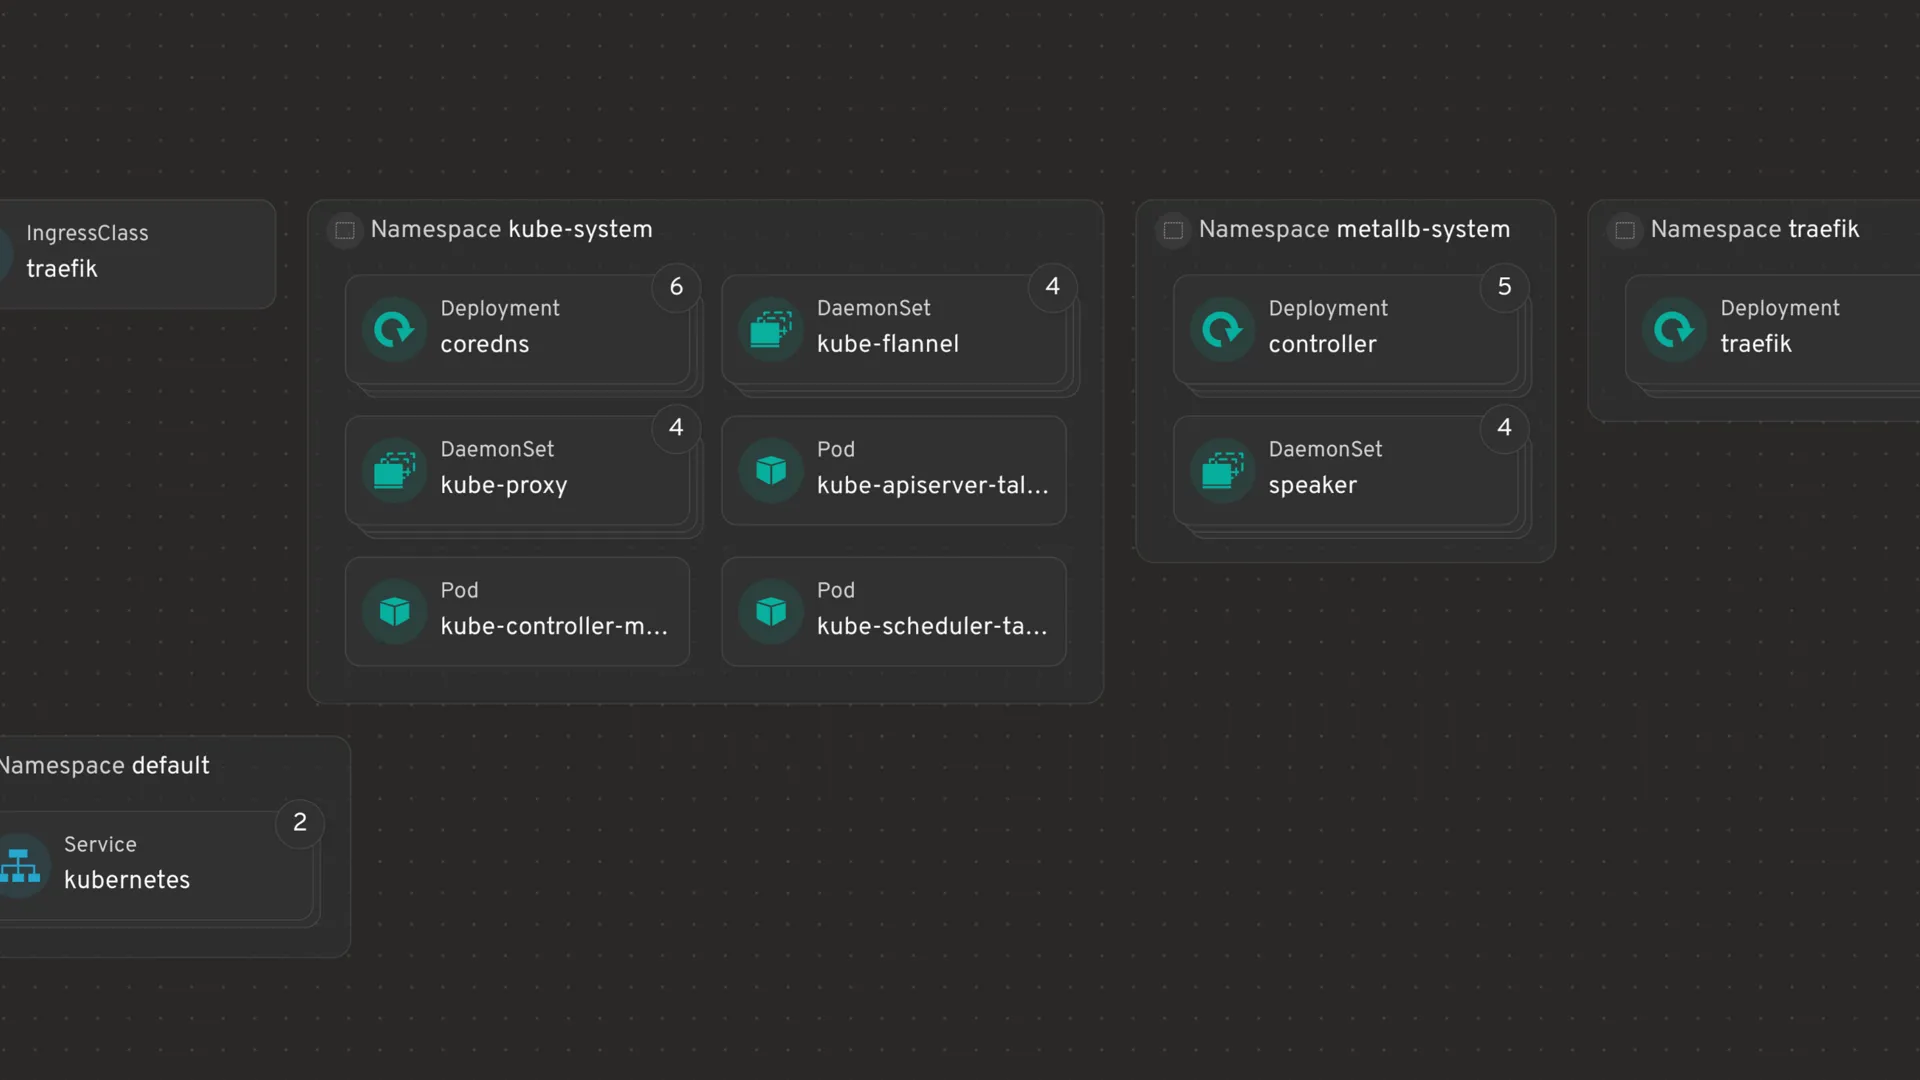
With the cluster up and running it's now time to add MetalLB.
Why is this necessary, well, the cluster needs a way to expose the services internal to the cluster to the outside.
This is where MetalLB comes in handy, as you would otherwise have to build a advanced load balancer setup on the network layer.
Of course there are many cases where the network layer is the right place for this, but a simple homelab setup, probably not.
MetalLB can be added to the cluster by installing the manifest as follows:
kubectl apply -f https://raw.githubusercontent.com/metallb/metallb/v0.15.2/config/manifests/metallb-native.yamlNote: This is the version I used at the time of writing, you might need to adjust this.
When MetalLB is installed in the cluster, you need to add two Custom Resources(CRs).
Create a YAML file called metallb-ipaddresspool.yaml and add this content:
---
apiVersion: metallb.io/v1beta1
kind: IPAddressPool
metadata:
  name: lb-ip-pool1
  namespace: metallb-system
spec:
  addresses:
  - 192.168.1.11/32 # Change this

---
apiVersion: metallb.io/v1beta1
kind: IPAddressPool
metadata:
  name: lb-ip-pool2
  namespace: metallb-system
spec:
  addresses:
  - 192.168.1.12/32 # Change this
This files creates two address pools.
I've done this to keep things simple, but you can change it however you like by following the MetalLB docs.
The two address pools are setup this way so that some services can run consistently on one worker node.
I know this isn't really in the spirit of K8S, but it is the simplest way to get started.
Pool 1 will be for the ingress controller, Traefik in my case, and pool 2 is for any all the services.
It's currently setup for my test network, so adjust the IPs to match your own network.
Create a YAML file called metallb-l2advertisement.yaml and add this content:
---
apiVersion: metallb.io/v1beta1
kind: L2Advertisement
metadata:
  name: lb-l2-n1 # Load balancer Layer2 Node 1
  namespace: metallb-system
spec:
  ipAddressPools:
  - lb-ip-pool1
  nodeSelectors:
  - matchLabels:
      kubernetes.io/hostname: traefik

---
apiVersion: metallb.io/v1beta1
kind: L2Advertisement
metadata:
  name: lb-l2-n2 # Load balancer Layer2 Node 2
  namespace: metallb-system
spec:
  ipAddressPools:
  - lb-ip-pool2
This file is very important as it informs MetalLB which services can be exposed via which address pool.
For this guide only lb-l2-n1 is used and only for Traefik.
MetalLB References
Traefik
Prepare cluster
helm repo add traefik https://traefik.github.io/chartshelm repo updatePrepare Traefik values
Create a traefik-values.yaml file with this content:
---
service:
  enabled: true
  spec:
    externalTrafficPolicy: Local
  annotations:
    service.beta.kubernetes.io/metal-lb: "true"
    metallb.universe.tf/address-pool: lb-ip-pool1
  type: LoadBalancer
  ports:
    web:
      port: 80
      targetPort: 80
    websecure:
      port: 443
      targetPort: 443

# Enables the dashboard
ingressRoute:
  dashboard:
    enabled: true
    entryPoints:
      - websecure
      - web
    matchRule: Host(`dashboard.example.cloud`) # Change this or add a entry in your hosts file
With the values in place, it's now time to install Traefik with the helm command:
helm install --values=./traefik-values.yaml --namespace traefik traefik traefik/traefikAdjust the path to the values file if necessary
At his point the cluster should be fully operational and a Traefik dashboard should be accessible on the address you used.
